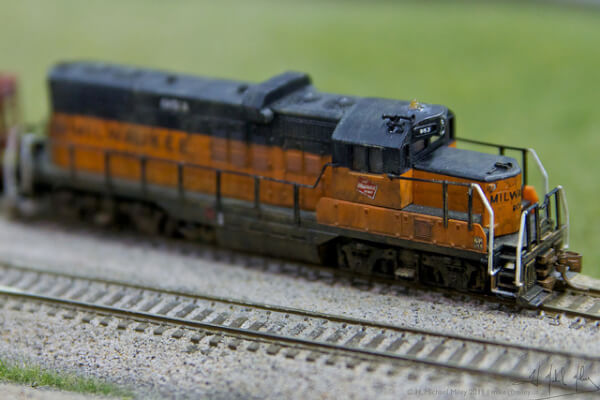
Ready to ballast your model train track? Or don’t even know what model train track ballast is?
Ballast is the rocks or gravel in between the sleepers of a train track. Adding ballast to your tracks is a really good way to help blend it into your scenery and add a sense of realism. The problem with using lots of little stones and gravel is that they’re going to go everywhere!
Adding model train ballast is a personal thing depending on your scenery. Some people like to add corkboard under their track to give it a raised effect, other people just add ballast flat to the boar
When working out what kind of ballast you’re going to use, make sure it’s an appropriate size and colour to the rest of your layout. Ballast that looks correct on an HO scale is going to look huge on an N scale layout.
If you’re going to ballast ho track or add o scale ballast, the size of the dust and rocks are so important to make things look realistic.
Colour can also play an important factor in how your ballast interacts with the world around you. A Wild West theme with grey gravel might look out of place as opposed to brown etc.
So what’s the best way to ballasting model train track?

How to Ballast your train track
Rock – Getting the right type of rock ballast for your train track can be tricky sometimes. Some people will find new ways to make their own. Crushing up granite, glass or even dirt and sifting it down into the required size is a pretty common method – (Don’t forget to use a mask if crushing up small particles). An easier, albeit slightly more expensive method, is to just purchase the model train ballast from a supplier like Woodland Scenics.
Cleanup – Take a soft-bristled brush and gently sweep the rocks into the desired place. Try and be as gentle as possible, otherwise, you’ll end up with rocks all over your layout. If you need to, you can also use a Q-tip to brush the rock of the track itself.
Glue – It’s important that once you place the rocks down, that you secure them in place with some kind of glue so they don’t go moving around, or end up on the track. Common PVA type glue will work just fine. Once you have your ballast rock in place, mix a 50/50 PVA glue and water combination, and using an eye-dropper put a small amount over the rocks. Make sure not to apply so much that the rocks shift. A single drop in an area will usually do to adhere them together and to the surface.
Tips to remember
Make sure you only use a PVA based glue. It’s strong enough to hold all the rocks in place but is still weak enough that at a later stage you can break or scrape off the rocks from your track to use at a later stage if you need to.
Paint the baseboard where the track will lay with a darker colour than what the rest of the ground around the area will be. This will stop any lighter spots from showing through cracks and make it look more natural in the long run.
Consider dry brushing your ballast once it’s set to give it a more natural, weathered look. Dry brushing is a technique where you use a dry brush and a little bit of paint to make something look older and just hit the highlights. Ungeek has a really great article about you can read if you’re interested.
If you have small bits of ballast stuck to your track after it’s done setting, you can take a small scalpel and gently scrape the excess off after the fact. Make sure you don’t push too hard and cause any dents in your track because it might make your model train derail.
Peter has been building model trains for longer than he can remember. An avid fan of HO and O scale this blog is a creative outlet to allow him to dive further into other scales and aspects of the model train community and hobby.
What ballast do you use?