Table of Contents
So you’re ready to learn how to lay down some model train track but don’t know where to start? Well, it can be an easy or complex one and is the difference between an amazing layout or an average one.
There can be a bit involved with really making sure that your train track is going to be vibrant, eye-catching, and something you’re going to want to keep using for ages to come!
There’s nothing worse than placing some track down and finding out that you’ve either not got enough track to complete your circuit, or your train won’t run on it smoothly, or it’s just a boring experience.
So what are some things that you should be thinking about when laying down your train tracks?
Let’s learn how to lay track!

Plan your model train track
Planning ahead is one of, if not, the most important things that you can do when first starting out with your train set.
Planning ahead means that you can work out what kind of a layout you’re going to have early on.
This means that don’t run the risk of sinking hours into a build only to find out your train can’t make it up an incline, or a turn is too sharp and your locomotive comes off the tracks.
It’s not the end of the world, but it’s definitely a massive hassle having to unfix a lot of track to readjust for a tiny mistake!
Some people like to use track planning software like SCARM or TraxEditor to work out what kind of layout they want to be laying down. Next, print out your layout on some A4 or whatever paper you have available and use it as a guideline for their payout.
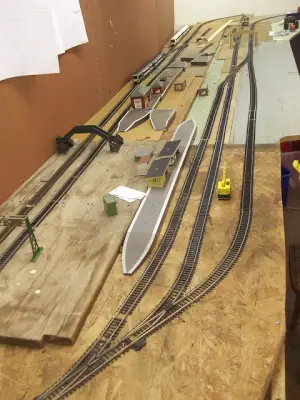
Or if you don’t want to spend any more time on a computer than you have to, just place all your track down on your board and lightly trace around them with a pencil so you know where it’ll all go before you fix it to the board.
So what do you do when you’ve got your rough layout worked out?
Temporarily secure your model train track down
Once you’ve got your plan down, place all your model train tracks down in the desired pattern. It doesn’t matter if it’s HO track laying or laying N scale track, the principle is all the same.
Using a tiny piece of blu-tack or double-sided tape is the perfect way to temporarily hold it in place while you make changes or adjust anything.
Once in place, check for any connection problems, harsh corners, electrical problems, too steep an incline, and make sure your train goes around the track smoothly several times before you lock in a position. Trains have a tendency to go around a track several times before they decide to come loose!
Once you’ve got your ideal train track set up, it’s time to start pinning!

Pin Around the Train Track In One Direction
So what does pinning mean? Well, pinning a train track is just the act of putting all the pins into your tracks so they stay in place.
Some tracks won’t come with pins like the Bachmann E-Z track series.
In that instance, you’ll either need to purchase some extra pins, find a way to secure it or hope it stays there (it probably won’t if your train runs over it constantly, so glue it, strap it or pin it, just find a way to fasten it down!)1
So if you’ve got a piece of track that needs pinning, it’ll have small holes in the track for where they go. Something like Lionels FasTrack pins in the center, so you can actually spin the track around if need be without needing to remove the pins.
Depending on what kind of baseboard you’ve got you might be able to push the pins straight in (foam) or you’ll need to make a hole for them if it’s wood or anything harder. This is where something like an Archimedes Drill comes in. It’s a small, hand-manual drill that’ll create precision holes for your pins.
So why pin in one direction? Well if you pin different sections of the track, there is every possibility that over time, if each piece of track is only off by a single millimeter or two, by the time you try and join you could be half an inch or more away and have to start again!
And that’s it, you’re done! You now know how to lay model train track!
Well, done so far as that your train can now go around the track. There are a few other things that you should keep in mind though!
Don’t put scenery down Before the track
It’s super important that you don’t jump the gun and start with your buildings or trees, or at least putting them in permanently.
Because they’re pretty vertical structures, it’s super easy to either knock them or have them get in your way as you place your track.
When we say scenery, we mostly mean anything that needs to be placed down after you’ve built your track layout.
Screw down your train track
This is a great little tip from Andy over at Model Railway Engineer. He places a small screw in between the sleepers with a screw-head big enough to sit on the two.
Making sure to place a small V-shaped piece of cardboard in between the screw and sleeper helps to avoid damage.
This is an awesome way to be absolutely certain that the tracks won’t move when placing pins, removing the tape, and checking the locomotives run smoothly.
Peter has been building model trains for longer than he can remember. An avid fan of HO and O scale this blog is a creative outlet to allow him to dive further into other scales and aspects of the model train community and hobby.
Hello. I’m a newbie. How do I layout tracks for bridges and elevated mountain side tracks? Is there a dedicated tracks for such layouts? Thank you.