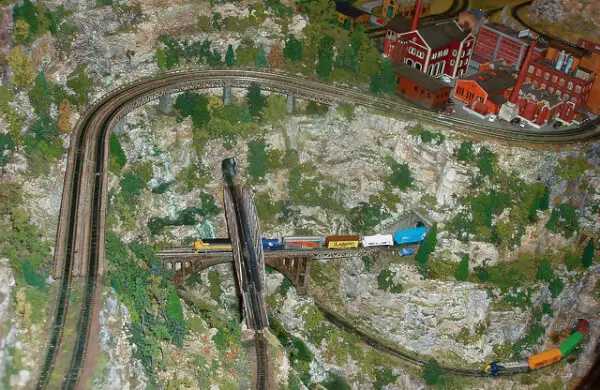
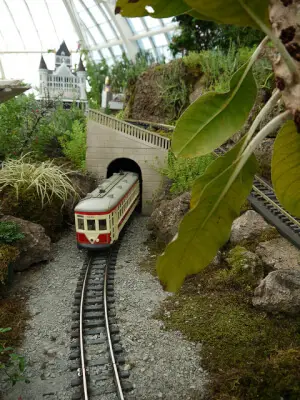
Want to learn how to make mountains for model train layouts? It’s actually super easy!
There’s nothing better than model railroad mountains that sits proudly on your layout for your train to either go around, up or even through!
Plan your layout
This is the most important part of the whole process when making hills and model train mountains. There’s nothing worse than laying down your track, adding ballast, and then realizing that you actually wanted this part of the track on a hill.
Or worse yet, spending ages on a hill only to realize the hill incline is too steep for your trains to make it up!
So what should you be looking at when you make hills and mountains for your layout?
Well, you need to make sure that any hill you build is going to adequately allow for your train to travel up its slope or plan accordingly around that. Model trains can actually go up steeper inclines than the real thing.
So what’s the best way to build a hill or mountains for your model train set?
Paper mache’ build
This is a super quick and easy method if you aren’t sure about how you want your final layout to look, or if you’re a beginner. The whole method basically consists of scrunching up newspaper, then layering paper mache over the top to create hills and model railroad mountains.
Paper mache is really quick and easy to make too, and you can use common household items. Paper mache is made up of a 50/50 water and flour combination. By mixing one part water and one part flour into a bucket and stirring it until it reaches a glue-like consistency, you’ll have a paste you can dip newspaper in.
Once you’ve got all your paper scrunched up, and taped down to form the insides of a hill that you like, take large sheets of newspaper, dip them in the paste, and lay them over the top. It’s best to build up layers, and have 6 or so sheets over the top of each other.
This just helps to provide added strength; if you notice any dry parts of the newspaper take a brush or use your hands and just apply more paste. After 24-48 hours depending on the temperature, it will dry almost rock hard, allowing painting any way you like!
Wooden screening and support method
This is the most permanent type of modelling that you can do, so you’d better be sure that this is how you want your setup! So what’s so good about this though before we get into it? Well, because you’re using wooden cross-beams or stronger material than paper mache, you can place your trains on top of them!
So how do you go about making them?
You can use something like thick cardboard for this, although wood tends to work better. You basically cut out vertical struts of wood before placing horizontal cardboard strips or wood to make a skeleton of how your mountain will look. Then cover it in wire screening to give it a strong foundation and apply plaster of Paris over the top.
This is a super sturdy method and you’ll easily be able to run track, place buildings and greenery and anything else on top of it.
Foam carving
Foam carving is one of the easier methods overall and is kind of in the middle of both of the above two in terms of easiness and durability. This also makes it one of the more common!
Foam carving is literally exactly what it sounds like.
Take some styrofoam or some other form of durable foam and glue them together to get the desired height of your model railroad mountains and hills. Then, just start carving away from the foam to get your desired shape and size.
Once it’s completed, you can either leave it as is and paint it, glue dirt to it, and add grass, trees etc. This still can come across kind of cheap though due to the smooth nature of the styrofoam.
If you apply some of the techniques from the wood screen method and apply a thin layer of plaster-of-Paris over the top of your foam, it helps to give the ground an uneven and more natural looking texture.
From there, you can add your dirt, grass, and anything else you want. Plaster of Paris is a lot easier to sand off and manipulate to place items down on top of than styrofoam too, so it’s the preferred method over paper mache even!
Access in tunnels
Eventually, your trains are going to come off their tracks, and there’s nothing worse than having them derail in the middle of a tunnel you can’t get your hand into!
So the best solution is to always make sure that you always have a way to access the insides of your tunnel so you don’t have to drag your trains along the track to get them out.
Because of the nature of just scrunching paper and paper-mache over the top of it, it’s not at all structurally sound so you’d need to build a tunnel out of cardboard or other material first.
Because it’s hard to build access points out of really soft material, this is probably not a great material to use for tunnels, but if you do, it’s light enough you should be able to lift up the whole model train mountain if need be.
When building your tunnels out of wood screening and cardboard, it’s mostly placed against the side of the table or layout area, so you can just leave the back exposed to get your train if it derails. Alternatively, because it’s wood you could build a small hatch in the back with some hinges so you can get in
Foam is probably the best, and it’s the same sort of system as what you could do with the paper mache. By building up your mountains in layers, you can carve your tunnel into the foam as you work. This also means you only have to pop off the top layer of foam to get to your trains if you have to.
So there you have it! Thats how to make mountains for model train layouts. If you want a hill that you can go up instead, take a look at our post about model train inclines!
Peter has been building model trains for longer than he can remember. An avid fan of HO and O scale this blog is a creative outlet to allow him to dive further into other scales and aspects of the model train community and hobby.


The “paper mache” method is a problem inasmuch as it contains flour which is wheat which is food and will attract insects and vermin.
I crumple up aluminum foil and spray paint it and flock etc. Amazing what aluminmum foil will look like.
I’ve found the foam method the best, it’s light weight and easy to work with. You can even get scraps from a builder if you know one. You can add rock outcroppings where needed and then Smooth on ready mixed sparkle with a putty knife for an even better effect. Once the sparkle dries, paint with earth tone latex and sprinkle ground foam for dirt, grass, etc before the paint dries. It’ll look great! Cheers!,
I think I will try the tin foil that sounds good to me
How did the tinfoil work out for you?